Monday, 3 December 2012

Gandalf and Shadowfax

As mentioned in a earlier post (http://kunstmanns-workshop.blogspot.dk/2012/10/finecast-gandalf-white.html) my dear girlfriend gave me this awesome Fincecast of Gandalf the White, which contained not one, but two full models! The second model consists of both Gandalf and his trusted horse, Shadowfax (Lord of Horses)...

Though I finished the model some time ago, I've kinda forgotten to get my blog updated with the WIP and final paintjob pictures. However, here they are now, enjoy!:D

Here he is all glued together and fixed with some liquid Green Stuff. Ive added a few rocks to the base to create a bit more interesting surface...


The base is now finished with several layers of drybrushing, and Gandalf (and his horse) has been based with Skull White...

I've clearly been a bit slacky with the WIP pictures, so here the figure is in its final form:D


Really happy with how the horse and his robes turned out, but the face could still do with some more work, clearly not my strongest side... I might get back to redo that later. For now he's guarding the entrance to my office and YOU SHALL NOT PASS!

Monday, 8 October 2012

WIP: Ork Boyz (part 1) - green aint just green

Having finally completed my first squad of Space Marines, along with my other side projects, I can now finally turn my attention towards the other half of my Battle for Black Reach set, the might Ork Horde!

To kick this off I've decided to paint 10 of my 20 Ork Boyz. I reckon that doing all twenty at once will just make it seem like to big a task...The Boyz are already assembled and based with Chaos Black along with my Space Marines months ago, so following my standard procedure I've started with the inside elements. In this case eyes and mouth

Eyes and tongue are painted Red Gore and washed with Biel Tan. The teeth are painted with Khemri Brown and highlighted with Bleached Bone. Now for the Ork skin. After many attempts I decided on the following combination of colours and washes...

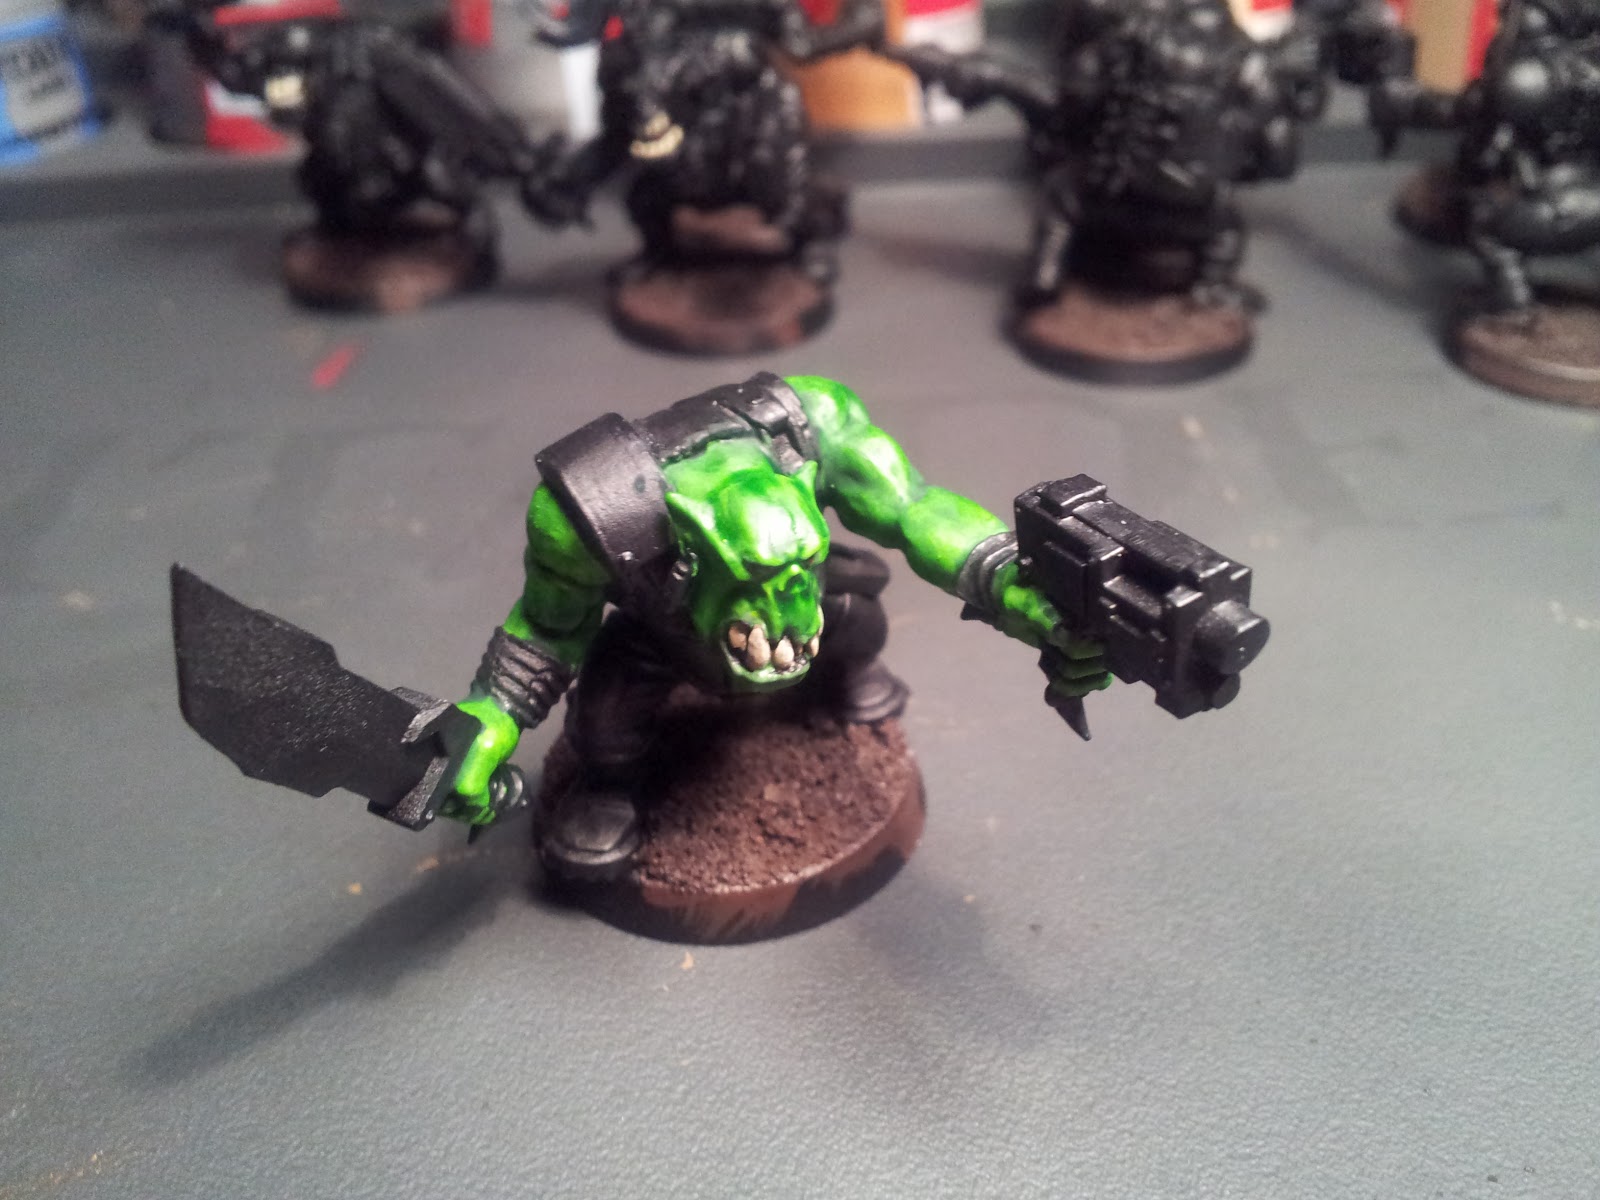
All skin areas are covered with two thin layers of Warboss Green (thin smooth surface) followed by highlights using Moot Green. These highlights really help define the muscle structure. Finally, 2 washes with Biel-Tan to help blend the colours together, resulting in a super nice finish... Now to repeat for the other 9 Orks, starting with the base colour of Warboss Green

And then Moot Green highlights... I'll save the washes until I cleaned up the black areas and done other remaining details... To be continued :D


Wednesday, 3 October 2012

Space Marine Tactical Squad Sergeant

Having finished my Tactical Squad a few weeks ago (here) it's now finally time to complete the 10man squad by painting their beloved Sergeant. As with the regular marines, I've first painted the inner elements (in this case only the flex-joints), before moving on to the base colours. Here's the guy with base, armor, tabard and purity seals painted

Tabard and seals washed and gold elements painted with a warm brown to get the proper toning later...

And here with most outer elements painted, along with all gold and a base colour on his face

And finally here he is in all his glory after a wash and some line highlights..


With the first squad of my marines finally done its time to get working on some of the Ork Horde, stay tuned for updates soon...

Finecast: Gandalf the White

Out of the middle of nowhere my lovely girlfriend Lauren decided to buy me this guy, the one wizard to rule them all, Gandalf the White! He's a Citaldel Finecast and the box comes with two models, one of Gandalf standing in a powerpose and another of him showing off on Shadowfax... As a token of my gratitude I decided to paint posing Galdalf first as a present for Lauren... I decided to mount him on a "giant rock" to make him stand out a bit more. After some cleaning, glueing and base-coating this is how he looked

This is the first time for me painting human faces, so this took quite some experimentation. Here he is with a base flesh-colour, along with some initial base colours

Here he is now with a lighter skin-tone and some shading to the face and hands. I've also drybrushed the rock with a dark grey to enhance the borders, along with hair and beard (painted light grey and brushed white)

Skip forward to an almost finished miniature. His outer robe has been painted with a 2:3 mixture of bleached bone and skull white and then drybrushed white to highlight. The inner robe is painted with a 1:3 mix, while his "under-robe" is left in skullwhite...


Finally here's the end-result, which I must say I'm really pleased with! He now guards over Lauren's PC and YOU SHALL NOT PASS! :D


Monday, 1 October 2012

Khorne Chaos Lord on Juggernaut

Wow... This guy has really been a challenge for me. Considering I got him for my birthday in November last year and just now finally managed to finish him really says it all. The miniature itself is simply awesome looking and it has taken me a lot of brainpower and snooping around on the net to decide how to paint this guy...  As mentioned in an earlier post I started on the Juggernaut itself months ago, so finishing this was the first step. After painting every detail, a few careful washes and line-highlights this is the result
Finally happy with the mount I moved onto the Khorn Chaos Lord himself. This is how he looked prior to being mounted, washed and highlighted...


And here's the final result! I'm really proud of how this guy turned out and know he will look just great next to his fellow Chaos Warriors. Enjoy the pics :D


(On a final side-note, his base is deliberately left half-empty as I'm wanting to put a pile of skulls there once I get hold of some...)

Friday, 7 September 2012

Space Marines WIP (part3) - freehanding to the finishline

My squad is now finally as good as done :D Taken me quite some time to finish all the details but I'm really happy with the results... Painting guys in full power-armour is certainly quite a different challenge than all the fur on my Chaos Warhounds, but one I have enjoyed even more...


Two things are still missing before they are truly done. One is basing with some static grass which is quite fast, while the other is quite a challenge. Inspired (as usual) by Ron on FromTheWarp I decided to give the Ultramarines logo a shot in freehand painting. Below you can see Ron's tutorial as well as the final results on my first Marine. Could be better, but certainly also worse. When I'm done with all 9 I should have it down quite well :P


Now all I need is to repeat 8 more times to finish the entire squad:P Then its time to give the sergeant (seening black in the background on the first picture) some love and attention... Along with a few other side-projects. And then it's time to take on the Ork horde!

Monday, 27 August 2012

Space Marines WIP2

Picking up from last post where both armour and bases were based with a single layer (Macragge Blue and Scorched Brown, respectively).. Since then quite a bit has happened :D

First the armour plates were washed with Drakenhof Nightshade for shading effects. Secondly, the bases were finished with successive layers of drybrushing (Calthan Brown followed by Bleached Bone).

I've also finished the guns which I'm painting separately until the final highlighting. Metal areas are painting with Leadbelcher and gunstraps with Scorched Brown. All elements are then washed individually (blue, black and brown).

To paint the larger gold elements (chest sigil and shoulder rims) I've followed the advice of Ron on http://fromthewarp.blogspot.dk/ and based with a light warm brown (Calthan Brown) before painting Shining Gold on top. This allows for a single thin application of the metal paint, which leaves a smoother finish.

Finally, I've started on the remaining smaller elements such as belt and pouch (Calthan Brown, washed with Devlan Mud), grenades (Warboss Green washed with Badab Black) and purity seals (Bleached Bone washed with Devlan Mud)

Now all I'm missing is the remaining small outside elements and then some line highlights to make everything stand out a bit more... To be continued :D