Saturday, 30 March 2013

Space Marine Terminators

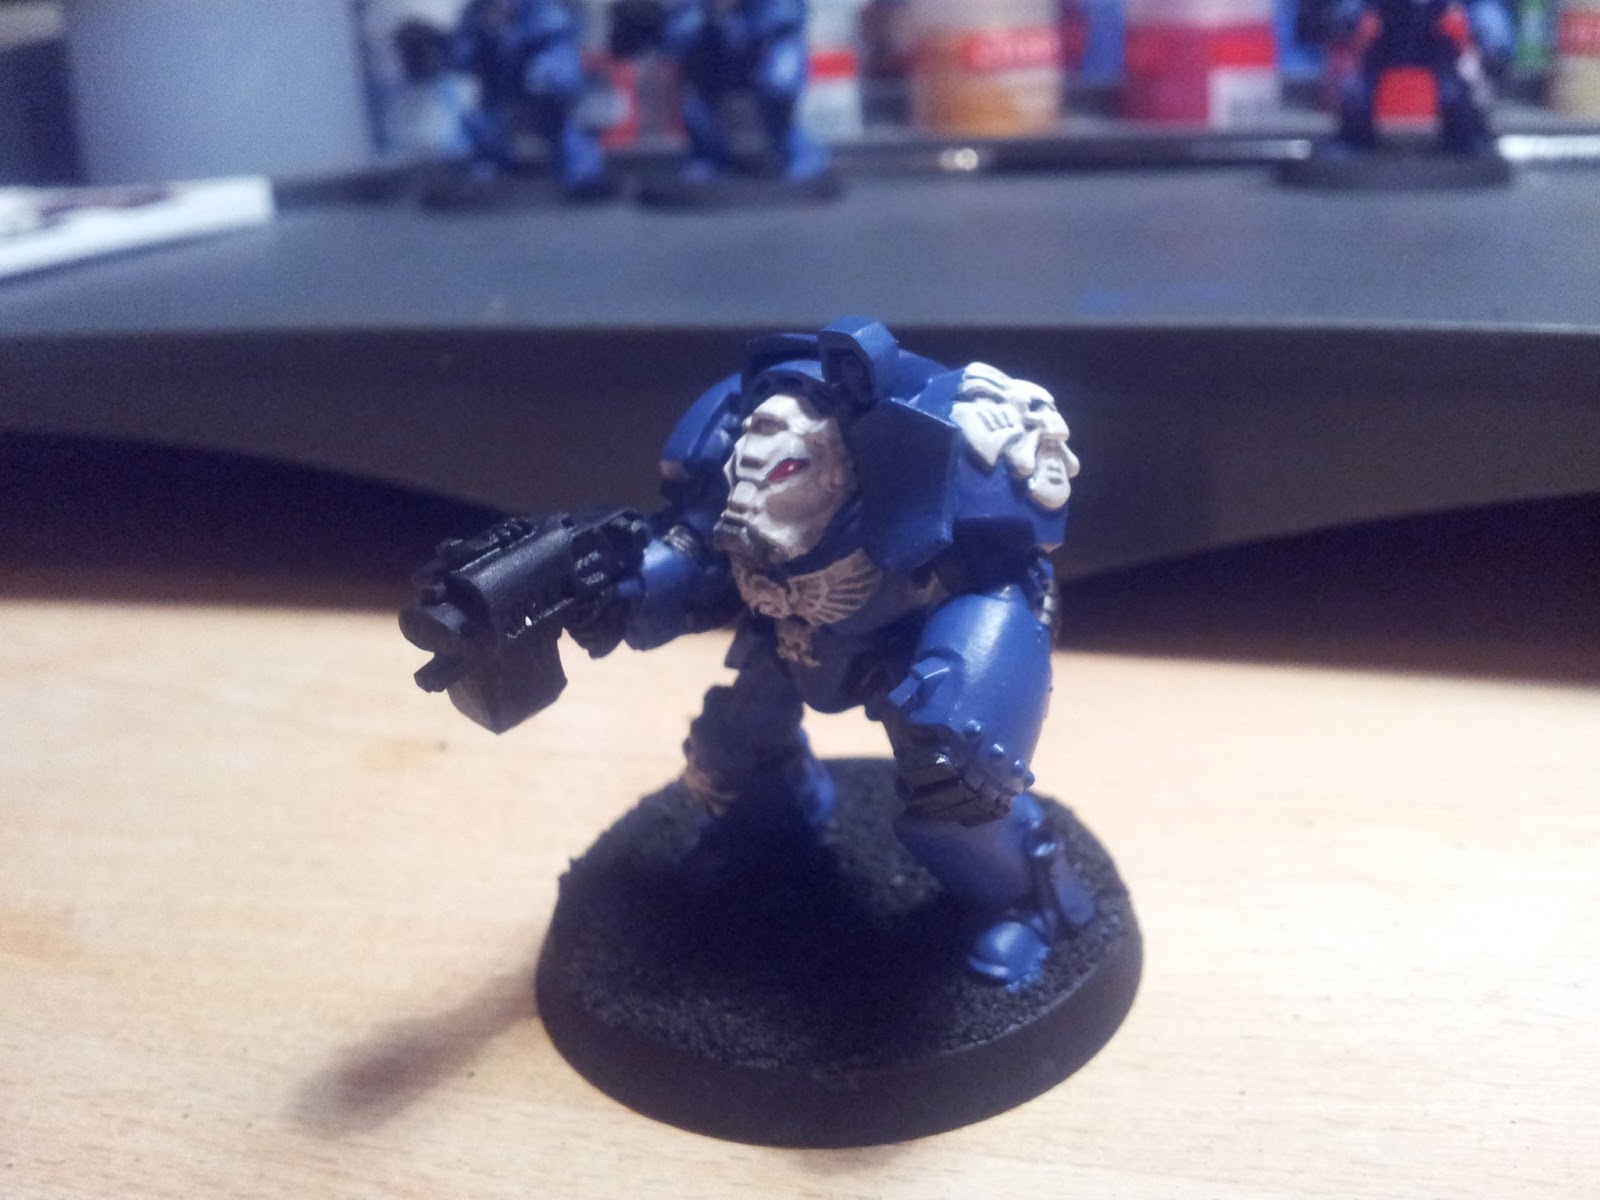
In my progress of slowly working my way through the "Assault on Black Reach" miniatures the turn has finally come to my Space Marines Terminators which I honestly think is some of the coolest miniatures I've yet to paint... Even though I started back in December, most of the painting has been done over the last 3 weeks.

Similar to my SM Tactical Squad I started painting the inside elements first, so again flex-joints and helmet lenses:

Following this is a simple step of painting all armour-elements in the blue base-colour (Macragge Blue in this case):

Turning to the white elements (helm and sigils) I've once again been following the great advice of Ron Ronsaikowski (FromTheWarp) and slowly building up the colour by successive layers of grey (Dawnstone followed by Administratum Grey and finally Skull White). The elements where then washed with a thinned Badab Black and drybrushed with Skull White to give them a more worn look:


From then on it was simply a matter of finishing all the remaining elements (gun, purity seals etc), done exactly like my previous Space Marines, and repeat for the remaining 4 miniatures:


The sergeant required a bit of extra work, specially his face and the power-sword, both which turned out really great imo :D I also managed to free-hand the Ultramarine symbol and Crux Terminatus on all 5 miniatures...

Next on the table is more Space Marines (yay!), including a Chaplain, Librarian, Biker and 5 Assault Terminators with interchangeable magnetized weapons...

Thursday, 7 March 2013

Reaver Titan WIP 2

I've clearly been a bad boy and have been neglecting my blogging updates the last few months... Truth be told I haven't been working much on my miniatures either...

That being said I do however have an update regarding my soon-to-be-finished Terminators ready soon and during the last 2 months I've also found time to work a bit more on some parts of my Titan Reaver, hence this post :D


Having finished the feet and slowly working on the legs I decided to take a detour and try my skill against a mighty PowerFist which is one of the many weapon-options for the Reaver... Below is big pile of WIP-pictures along with the final fist plus weapons-mount. Total worktime is probably close to 40 hours, so enjoy!:D


Friday, 4 January 2013

Reaver Titan WIP 1

Almost as usual, I was browsing around on the wonderfull "From the Warp" blog and was inspired by a post   regarding Titans! (http://fromthewarp.blogspot.dk/2009/04/clash-of-titans.html).


The image is from the original thread (found here http://www.warseer.com/forums/showthread.php?99442-Lack0F-amp-EoST-Build-a-Reaver-Titan). These things stand almost 50 cm tall are pure awesome killing machines build by the Adaptus Mechanicus to spread death and destruction among the enemies of the empire. Even though I only have a very small Space Marine army the thought of a gigantic cardboard killer robot is hard to resist...

The wonderful people behind the model are thankfully also CAD wizards and has provided the schematics on how to build a model of your own (direct download here https://www.box.com/shared/eha70afaud). Below is sample of how the model-construction works...


Without too much consideration about time investment or other things I decided to print off a few pages and build a part of the titan to get an idea about the amount of work involved...


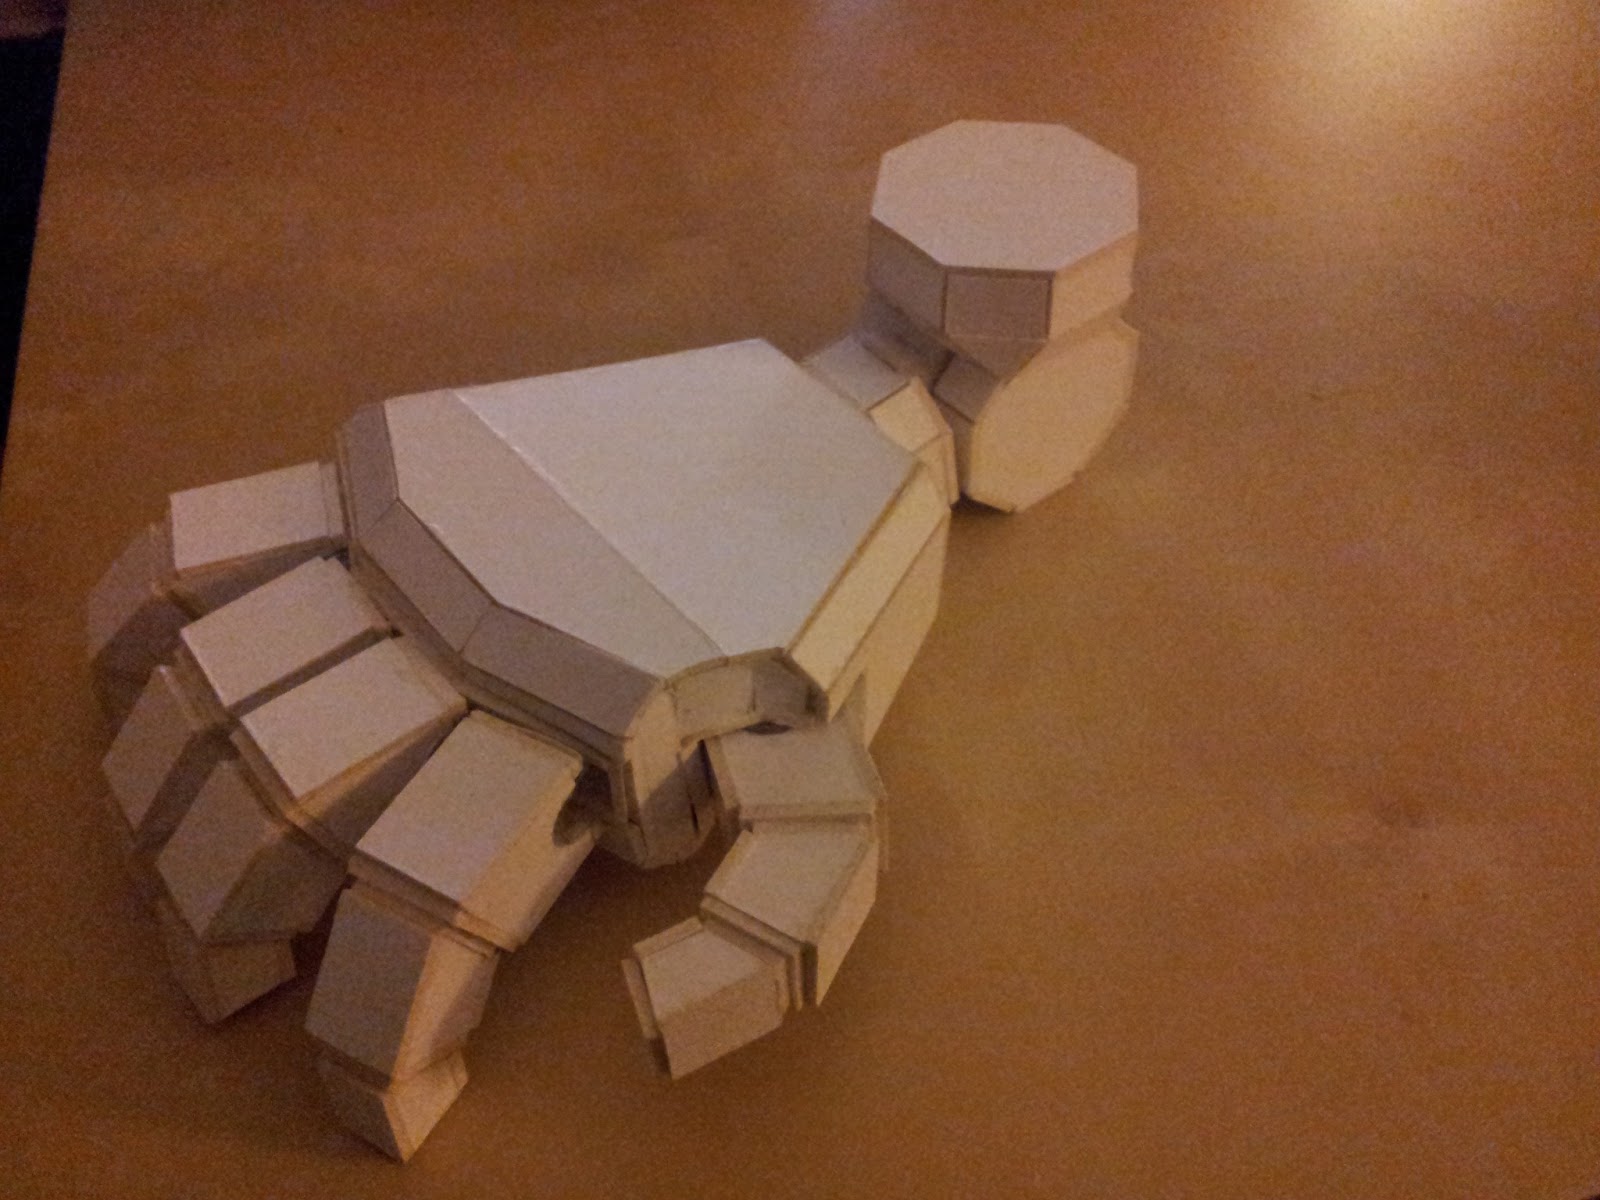
After a total of maybe 5-6 hours I managed to create the three-legged foot seen below. Considering my total lack of craftmanship it doesn't look half bad imo. However, working with corrugated cardboard sucks! Although easy and fast to cut the corrugated core makes some cuts very hard to properly glue as the boards are quite hollow. Furthermore, the whole structure feels a bit flimsy and light...

I did however have a great time actually building the stuff! It's a lot like Lego which I've always loved, as you have to follow directions but still have to work out many details yourself. Long story short, with plenty of time on my hands (thanks to Christmas break), I decided to soldier on and see if I cant manage to build the entire thing, over the course of XX months. A sturdier material was however required, so I opted to buy an A0 sheet of 2mm thick solid cardboard. Along with a proper Stanley knife and some glue the project has so far cost me around 160 kr (~ £17).

So, accompanied by various movies and TV-series found on my hard-drive I started over, from the bottom, crafting first one complete foot, then another. Here's a few progress pictures:


After roughly 15 hours spread over at least 3-4 days, the first foot was done.

And after another 15 or so hours (entire Band of Brothers plus at least 3 movies), the other foot is now complete...

I'm still have fun and it's quite relaxing having something to keep my hands busy while watching movies and TV, so I'm now moving onto the legs, properly interrupted by testing my craftsmanship skills on a powerglove and the head. More to follow in the coming weeks, although things might slow down a bit as Lauren will finally be home with me again :D

Sunday, 16 December 2012

All your base...

..are belong to me! I wanted to make a slightly more general post today, and as you probably guessed the topic is about basing. However, not just regular unit-bases, but also movement trays... These simple plastic or resin trays allows placement of multiple units inside and hence allows fast and well-organized movement on the battlefield. Alternatively, they can simply be a nice addition to exhibited units and armies.

While GW do sell a limited selection of these themselves, there is an unlimited variety and supply out there on the WWW.  I found a bunch on ebay (sold by wargamestournaments), in various sizes and shapes, with both square and round holes. Each was around 7€, give or take. These particular trays are cast in resin and were quite rough on arrival. Nothing a little sandpaper couldn't handle though :) Here is an untreated 10 unit (round 28mm) tray straight from the package.


In order to make the trays fit the bases of my current units I've opted to add some texture before painting. This is easily done using sand. I'm lucky enough to live near the sea and can simply go down and scoop up a can-full.  Below is shown the basics needed for some quick base pimping; glue, sand, an old brush and some toothpicks.

All desired surfaces are covered in glue which is spread evenly with the brush. The whole tray is dipped in sand and left to soak for a minute or so. Afterwards the toothpick is used to pick out unwanted splodges of sand and glue... I usually leave the bases to dry overnight before moving on to the next step.

To undercoat the trays they are spray-painted with Chaos Black to ensure that all colours will stick properly afterwards...

To now apply a base colour, strongly watered-down paint is used. This allows it to soak into the sand for proper coverage. In this case Scorched Brown is used..


After the initial layer of paint is dry it's time for some drybrushing. By applying paint (first layer is Calthan Brown) to a special drybrush (with short stiff bristles) and then wiping the excess paint on a piece of kitchen-roll until almost none remains. Now I can simply "brush" across the structured surface and only a very small amount of paint will collect on the tops of the surface. The image below shows a half-finished tray for comparison.


After 2 layers of drybrushing (second layer here is Bleached Bone), the trays will look something like this...


Now all that remains is to apply some static grass to finish of the scenic trays...

Finally, here is a bunch of my finished trays in use by my various unites... Hope you enjoy :D


Monday, 10 December 2012

Ork Boyz finished!

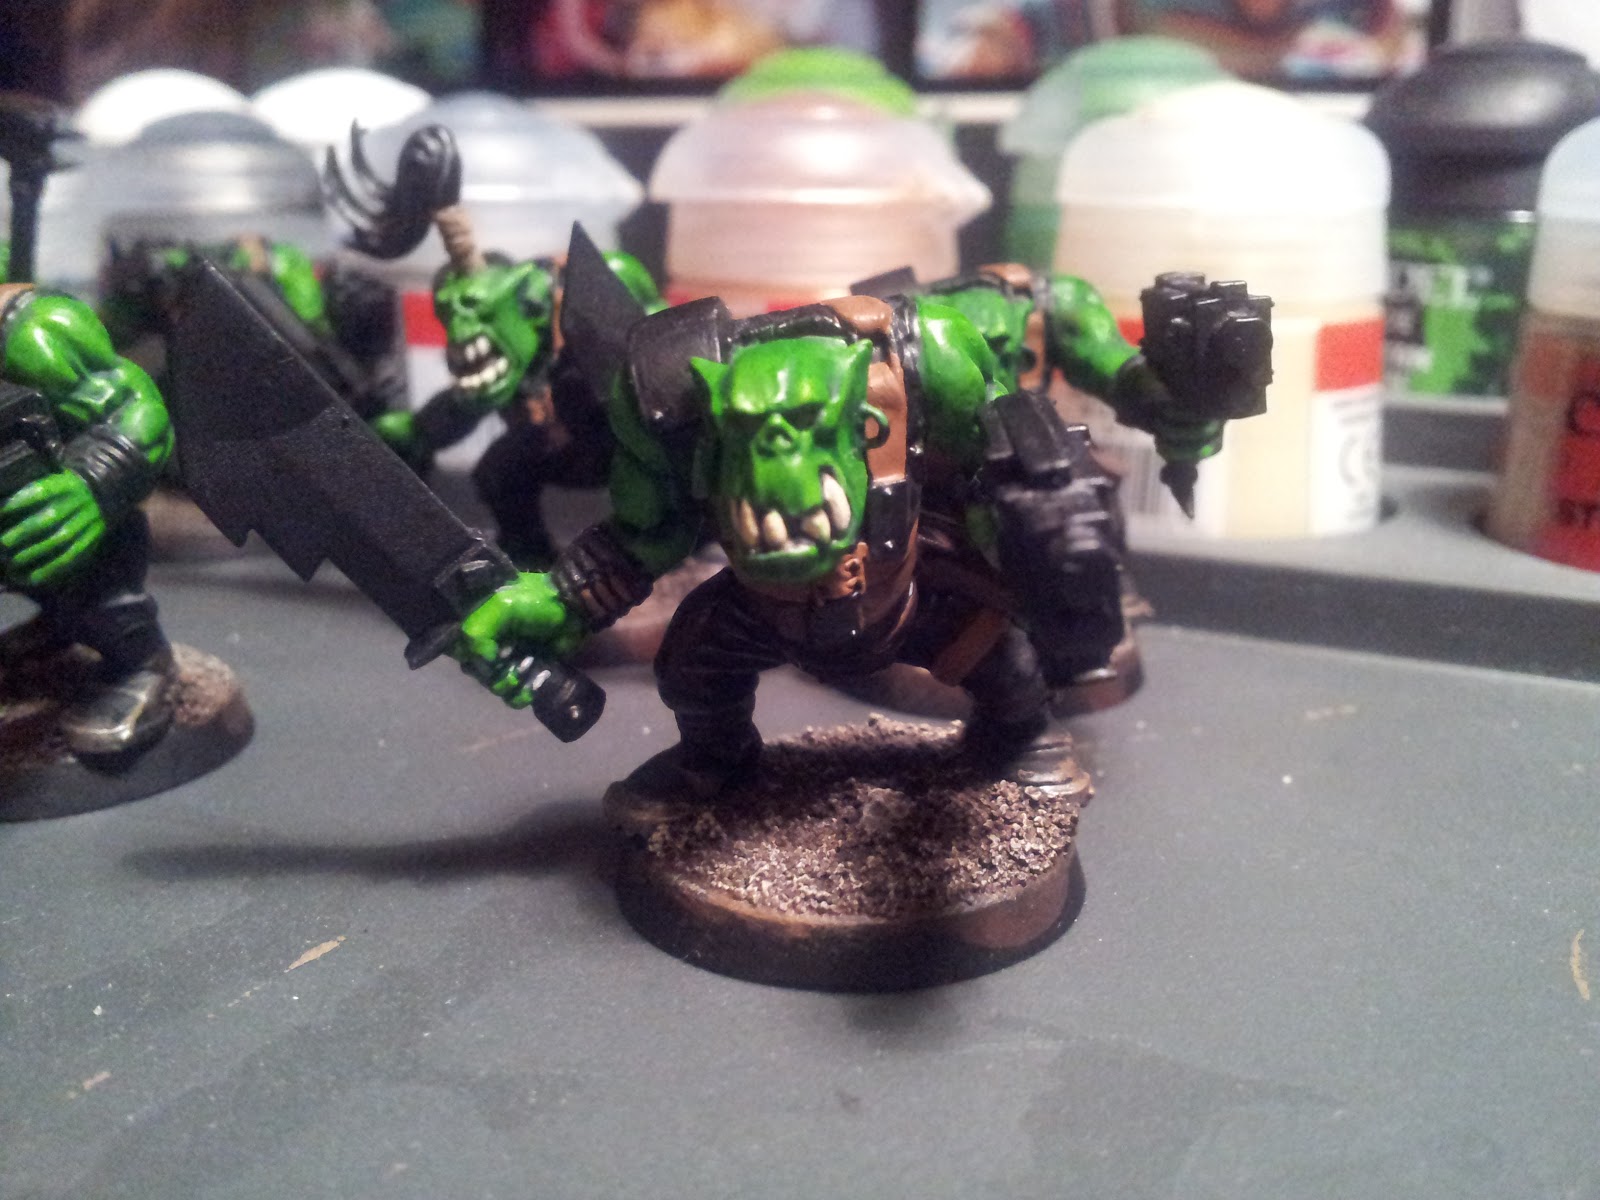
After being engaged in a few side projects (like my two Gandalf miniatures), finishing reading A song of Ice and Fire (up to book 5 at least) and plowing through 10 or so Star Wars books,I finally again found time to get my Ork Boyz finished. In my previous post I had the characteristic green sorted, but everything else was pretty much lacking... Again I've been a bit lazy with the WIP pictures, so I apologize for the small amount of images...

First step was armor, which I decided to keep mainly black, while painting the various leather straps, belts and stachels in either Clathan Brown or Scorched Brown (washed with Devlan Mud). Metal parts are painted with Leadbelcher, while the black boots and trousers + shirt are highlighted with Dawnstone (both washed with Badab Black)... 


Second order of business is the weapons.  Blades such as axes and swords are painted in Leadbelcher with the sharpened bits being Chainmail. Guns are kept mainly black, but metal parts are also painted with Leadbelcher. Sword-handles are painted with Tin Bitz for a lovely worn bronze colour. Everything is washed with Badab Black and highlighted with their respective colours...


Finally the last few details are line highlighted, static grass applied and everything is cleaned up etc. The final product is something I'm really proud of and honestly has turned out way better than I expected! Hope you enjoy and stay tuned for some (hopefully fast) updates about my next project, my Space Marine Terminators...